A Python Will Keep Your Fridge Cool

It all started with a user need and it is related to one of the key elements of any household: the fridge.
Sometimes my fridge’s door does not close completely. If one pushes it too hard, it rebounds and stays slightly open. Not open enough to be noticed, just a few millimeters, but open enough so that, in the morning, the fridge’s content is a bit damp. Besides, it is not very energy efficient.
For a while, I just ignored the problem. “It will go away” .
But one day, I decided to attack it with DIY electronics and some code. Here comes the Door occasionally open Detector a.k.a DooD (I like palindrome).
My intent was to build an inexpensive device that would detect an open door, and annoy the user just enough for him to have no other choice but to close the door for good. I also wanted this device to be solar powered and written in Python.
A solar powered solution removes the need of a power cable and the less cable, the better. I chose Python because I use this environment in many other projects (e.g. on Raspberry PI) and I like it.
The Processor
For the processor I selected an ESP8266 microcontroller, mostly because I had one laying around on my desk. A microcontroller is an all-in-one chip, including a microprocessor, RAM, flash memory, and a bunch of peripherals to connect to the external world. The ESP8266 also includes WiFi, together with a full HTTP stack, and is thus a perfect device for IoT (Internet of Things) projects. Note that in my fridge project I am not using the WiFi capability.
This microcontroller is also dirt cheap (a couple of US$) and consumes little power, which is critical for battery operated solutions.
I used a Wemos D1 mini, but any ESP8266 with at least 1Mb of flash memory, and 5 GPIO will suffice. One can find dozens of such models on the internet.
Note that the ESP8266 has a big brother, the ESP32, which is overall more powerful (processing power, memory, storage, Input/Output), and supports bluetooth as well as WiFi. The application could easily be ported to the ESP32, even though it does not require its extra capability.
Hardware Configuration
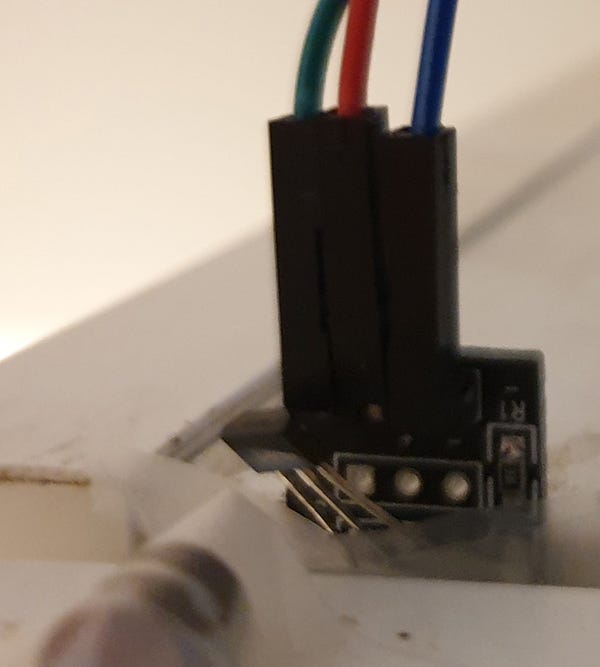
The door status (open, closed) is provided by a Hall effect sensor.

This sensor is sensitive to magnetic fields. The sensor is fixed on the fridge’s structure, while a small magnet is fixed on the moving part (the door). When the magnet is away from the sensor, the Hall effect sensor triggers a signal to the ESP8266.

The positioning of the magnet on the door was surprisingly easy and it detects a door just a few millimeters open. The magnet is fixed with adhesive tape. I appreciate this is not industrial grade, but it works so far.
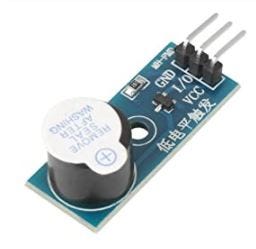
User feedback is provided with a led and a buzzer. Both are driven using ESP8266 digital output pins.
The led is used both as a visual clue that the door is open (it will lit solid), and as a clue that the system is alive (it will lit briefly every 30 seconds)
The buzzer is loud enough to be heard in rooms around the kitchen and is quite annoying.

Both sensors are also very cheap ( a couple of US$)
Note that the Hall effect sensor has a on-board red led which lights up when the sensor detects the magnet. This is convenient for setup and debugging.
Power to the ESP8266 is provided from a LIPO battery, connected to a LipoRider Pro board. The LIPO is charged by a small solar panel.
On the Front of the LipoRider : the USB type A connector powers the ESP8266 and sensors.
On the back of the LipoRider : The left JST connector is for the solar panel. The right JST connector is for LIPO. The mini usb in the middle is to charge LIPO from any USB charger.
Caution: LIPO are high energy density devices and need to be used carefully. In particular, one should never over discharge a LIPO. Doing so will damage the battery chemistry, and may create problems with subsequent recharges, including the battery catching fire (the internet is full of LIPO exploding when poorly used). So always use a LIPO charger or a LIPO itself that features an over-discharge protection.
There is also a N Channel Mosfet (2N7000), whose use will become clearer when I describe the actual code.
Software
Unlike single board computers such as the Raspberry PI, the ESP8266 does not have an operating system per se. Its personality is set by flashing a firmware, which will land in flash memory.
Python for microcontrollers is available at Micropython (or circuitpython from Adafruit). Follow instructions to install micropython on the ESP8266.
You will need an IDE. Look for uPyCraft, VScode, Mu, or others. Typically the IDE allows downloading the micropython script to the microcontroller via USB. Just reboot the microcontroller, and it will execute the script.
The micropython script is available on github and uses 5 GPIO pins:
- input to get door status, from Hall effect sensor
- output to drive the buzzer
- output to drive the led
- output to drive the mosfet
- input to prevent deep sleep (debug)
The micropython script is quite simple, and uses the deep sleep feature of the ESP8266.
Deep sleep is a mode in which the ESP8266 consumes very little power, an order of magnitude less than while running. Using deep sleep is critical to save power in battery operated devices. Pin D0 and RST need to be connected for deep sleep to work.
When one powers on (or resets) the ESP8266, the micropython script automatically starts and reads the door status (open or closed)
If the door is closed, it enters the deep sleep mode, for 30 seconds. After that time, the ESP8266 automatically wakes up, and the script starts again. As long as the door is closed, the script will keep waking up, and go back to deep sleep.
If the door is open, the script waits a bit (set to 30 seconds for now). After all, this is your fridge, and you have the right to open it and do your business.
If after this 30 second period the door is still open, it means someone forgot to close it or is painfully slow. The script will trigger the buzzer and keep it buzzing until the door is closed. We assume the buzzer will hit your nerves hard enough that you will have no options but to move and close the door.
When the door is finally closed, the buzzer goes off, the script enters deep sleep and the cycle restarts.
A debug feature can be activated by connecting pin D4 to ground. In that case, instead of going to deep sleep the script simply stops and you get the micropython prompt, known as the REPL (Read, Evaluate, Process Loop). At this point, you can interact with micropython, including download new version of the .py script , enter micropython instruction interactively, etc ..
To minimize power consumption, a Mosfet is used to cut power to the sensors (Hall and Buzzer) during deep sleep. This Mosfet is turn on/off using a digital output pin ( D8 on the schema)
A quick power measurement showed that the system consumes ~ 6ma in deep sleep, as opposed to 80–100 ma while running. However, unless the door is open, the script runs for 20 milliseconds only, and then deep sleeps for 30 seconds.
Let’s note that 6ma is way more than the tens of micro amperes range that the ESP8266 advertises as deep sleep’s power consumption . I guess this is because, for cabling convenience, the ESP8266 is powered from an USB connector. USB delivers 5V, whereas the ESP8266 is a 3.3v logic device. So the ESP8266 board includes a 5V to 3.3V converter, which consumes some power, even during deep sleep.
Another approach would be to power the ESP8266 board directly in 3.3 V, thereby bypassing the converter.
Note to the power conscious developer: a lot of circuits feature a ‘power led’ which lights up whenever power is applied. This is nice but wastes a lot of milli-amps. I recommend you to carefully destroy those leds, using a soldering iron or a cutter.
Operation
Now that the system is in operation, there is a very slight tension when we open the door: ‘Will I be able to do my business in time and beat the buzzer ?’
A first version of the script did not include the 30 sec grace period before starting the buzzer. In that case, an unlucky user could open the fridge right before the waking up of the script and be welcomed with the buzzer. Utterly unfair.
The fix took one minute, 3 lines of code and 30 seconds to download. Vive Python!
Note that this device also tells me that, from time to time, I am the guilty one leaving the door open. So, time for some humility too.
Further development
A possible evolution of this system could be to leverage the built-in Wifi capability to turn it into a connected fridge. For instance we could use the Blynk micropython library, or the MQTT client library to send alarms to a smartphone or to configure the 30s timer.
This would turn it into a Door occasionally open Management. DooM
